Course
Middleware
Next.js Mastery: From Fundamentals to Full-Stack
Unlock the power of Next.js with this comprehensive course! Starting with the basics, you’ll learn essential skills such as routing, data fetching, and styling. Progress through practical projects, including building your own React Notes app, to gain hands-on experience. Dive into the source code to understand the inner workings and core principles of Next.js. Perfect for developers with a basic knowledge of React and Node.js, this course ensures you’ll be ready to create high-performance full-stack applications efficiently. Join us and master Next.js, backed by industry experts and a supportive learning community.
Middleware
Middleware is a powerful tool that allows you to intercept and control all requests and responses within the application. For instance, you can rewrite, redirect, or modify request/response headers based on incoming requests. One common use case is authentication: before displaying certain content on a page, verify if the user is logged in; if not, redirect them to the login page.
Definition
To create middleware, you must define a file named
middleware.js or middleware.ts in the project's root directory.// middleware.tsimport { NextResponse } from 'next/server'import { type NextRequest } from 'next/server'; // The middleware can be an async function when using await.export function middleware(request: NextRequest) { return NextResponse.redirect(new URL('/home', request.url))}
// Set matching pathexport const config = { matcher: '/about/:path*',}Note: The project's root directory mentioned here is at the same level as pages or app. If the project uses a src directory, it should be placed under src.
In this example, we specify the path where middleware takes effect through
config.matcher and define the logic for setting middleware in the middleware function. The goal is to consistently redirect addresses such as /about, /about/xxx, and /about/xxx/xxx to /home.
Setting Matching Paths
Now that we understand its purpose, let's delve into its specific usage.
First, let's discuss how to set matching paths. There are two ways to specify the paths that middleware matches.
matcher
The first method is by utilizing the
matcher configuration option. Here is an example code snippet:
export const config = { matcher: '/about/:path*',}The
matcher supports both string and array forms for matching multiple paths.export const config = { matcher: ['/about/:path*', '/dashboard/:path*'],}
First-time users may find the usage of
:path* in matchers strange. This syntax originates from the library path-to-regexp, which converts path strings like /user/:name into regular expressions. Next.js utilizes path-to-regexp for parsing addresses internally. With a decade-long history as an open-source library, path-to-regexp is also utilized by popular libraries like express, react-router, and vue-router.
Let's delve deeper into its functionality.
path-to-regexp defines named parameters by adding a colon before the parameter name. The matcher supports named parameters. For example,
/about/:path matches /about/a and /about/b, but not /about/a/c. Note: in actual testing,/about/:pathcan only match/aboutand cannot match/about/xxx. To match/about/xxx, you need to write it as/about/: path/.
The default matching logic for named parameters is
[^/]+, but you can customize the matching logic by adding parentheses after the named parameter. For instance, /about/icon-:foo(\d+).png matches 1.png icon-about/, but not icon-a.png/about/. Named parameters can use modifiers such as * (0 or more characters), ? (zero or one character), and + (one or more characters). For example:/about/:path*matches/about,/about/xxx, and/about/xxx/xxx.
/about/:path?matches/aboutand/about/xxx.
/about/:path+matches/about/xxxand/about/xxx/xxx.
Standard regular expressions can also be used in parentheses; for instance,
/about/(.*), which is equivalent to /about/:path*.For example,
/( about|settings) matches /about and /settings but not other addresses.The pattern
/user-(jack|allen) matches user-jack and user-allen.
A more complex and commonly used example is:
export const config = { matcher: [ /* * Match all paths except those that start with: * - api (API routes) * - _next/static (static files) * - _next/image (image optimization files) * - favicon.ico (favicon file) */ '/((?!api|_next/static|_next/image|favicon.ico).*)', ],}It is important to note that the path must start with/. The value ofmatchermust be a constant so that it can be statically analyzed during construction. Dynamic values like variables will be ignored.
The power of matcher goes far beyond regular expressions; it can also evaluate
query parameters, cookies, and headers:export const config = { matcher: [ { source: '/api/*', has: [ { type: 'header', key: 'Authorization', value: 'Bearer Token' }, { type: 'query', key: 'userId', value: '123' }, ], missing: [{ type: 'cookie', key: 'session', value: 'active' }], }, ],}In this example, the route address is matched, but additional conditions are required: the
Authorization header must be a Bearer Token, the userId query parameter must be 123, and the session value in the cookie must be inactive. For more details on has and missing, please refer to the API section in next.config.js.
Conditional Statements
The second method is to use conditional statements:
import { NextResponse } from 'next/server'
export function middleware(request) { if (request.nextUrl.pathname.startsWith('/about')) { return NextResponse.rewrite(new URL('/about-2', request.url)) } if (request.nextUrl.pathname.startsWith('/dashboard')) { return NextResponse.rewrite(new URL('/dashboard/user', request.url)) }}The matcher is powerful, but sometimes it can be difficult to write. In such cases, you can write the specific logic in the middleware itself!
Middleware Logic
Let's look at how to write the middleware logic:
export function middleware(request) { // How to read and set cookies? // How to read headers? // How to respond directly?}
cookies
The usage is consistent with route handlers, using NextRequest and NextResponse to quickly read and set cookies.
For incoming requests, NextRequest provides
get, getAll, set, and delete methods to handle cookies. You can also use has to check for a cookie or clear to delete all cookies.For outgoing responses, NextResponse similarly provides
get, getAll, set, and delete methods to handle cookies. Here's an example:javascriptCopyimport { NextResponse } from 'next/server'
export function middleware(request) { // Assume the incoming request header contains "Cookie: nextjs=fast" let cookie = request.cookies.get('nextjs') console.log(cookie) // => { name: 'nextjs', value: 'fast', Path: '/' }
const allCookies = request.cookies.getAll() console.log(allCookies) // => [{ name: 'nextjs', value: 'fast' }]
request.cookies.has('nextjs') // => true request.cookies.delete('nextjs') request.cookies.has('nextjs') // => false
// Setting cookies const response = NextResponse.next() response.cookies.set('vercel', 'fast') response.cookies.set({ name: 'vercel', value: 'fast', path: '/', })
cookie = response.cookies.get('vercel') console.log(cookie) // => { name: 'vercel', value: 'fast', Path: '/' }
// The response header will be Set-Cookie: vercel=fast;path=/test return response}In this example, we called the
NextResponse.next() method, which is specifically used in middleware. After all, we're writing middleware, and after one layer of processing, the result still needs to be used in the next logic, so we need to return NextResponse.next(). Of course, if there's no need to go to the next logic, you can directly return a Response instance, which will be demonstrated in the upcoming examples.
headers
The usage is consistent with route handlers, using NextRequest and NextResponse to quickly read and set headers. Here's an example:
// middleware.js import { NextResponse } from 'next/server'
export function middleware(request) {  // Clone request headers  const requestHeaders = new Headers(request.headers)  requestHeaders.set('x-hello-from-middleware1', 'hello')
  // You can also set request headers in NextResponse.rewrite  const response = NextResponse.next({    request: {      // Set new request headers      headers: requestHeaders,    },  })
// Set new response header x-hello-from-middleware2 response.headers.set('x-hello-from-middleware2', 'hello') return response}The special part of this example is that when calling NextResponse.next, an object is passed to forward headers. According to the official NextResponse documentation, this is currently the only usage.
CORS
This is a practical example of setting up
CORS in actual development:import { NextResponse } from 'next/server' const allowedOrigins = ['https://acme.com', 'https://my-app.org'] const corsOptions = { 'Access-Control-Allow-Methods': 'GET, POST, PUT, DELETE, OPTIONS', 'Access-Control-Allow-Headers': 'Content-Type, Authorization',} export function middleware(request) { // Check the origin from the request const origin = request.headers.get('origin') ?? '' const isAllowedOrigin = allowedOrigins.includes(origin) // Handle preflighted requests const isPreflight = request.method === 'OPTIONS' if (isPreflight) { const preflightHeaders = { ...(isAllowedOrigin && { 'Access-Control-Allow-Origin': origin }), ...corsOptions, } return NextResponse.json({}, { headers: preflightHeaders }) } // Handle simple requests const response = NextResponse.next() if (isAllowedOrigin) { response.headers.set('Access-Control-Allow-Origin', origin) } Object.entries(corsOptions).forEach(([key, value]) => { response.headers.set(key, value) }) return response} export const config = { matcher: '/api/:path*',}
Response
The usage is consistent with route handlers, using NextResponse to set the returned Response. Here's an example code:
import { NextResponse } from 'next/server'import { isAuthenticated } from '@lib/auth'
export const config = {  matcher: '/api/:function*',} export function middleware(request) {  // Authentication check  if (!isAuthenticated(request)) {    // Return error message    return new NextResponse(      JSON.stringify({ success: false, message: 'authentication failed' }),      { status: 401, headers: { 'content-type': 'application/json' } }    )  }}
Execution Order
In Next.js, there are many places where you can set route responses, such as in next.config.js, in middleware, and in specific routes. It's important to note their execution order:
- headers (
next.config.js) - redirects (
next.config.js) - Middleware (
rewrites,redirects, etc.) - beforeFiles (
rewritesinnext.config.js) - Filesystem-based routes (
public/,_next/static/,pages/,app/, etc.) - afterFiles (rewrites in
next.config.js) - Dynamic routes (
/blog/[slug]) - fallback (
rewritesinnext.config.js)
Note: beforeFiles runs before filesystem-based routes, afterFiles runs after, and fallback runs last.
What's the purpose of this execution order? Let's test it with a demo. Here's the file structure:
next-app ├─ app │ ├─ blog │ │ ├─ [id] │ │ │ └─ page.js │ │ ├─ yayu │ │ │ └─ page.js │ │ └─ page.js ├─ middleware.js └─ next.config.jsIn next.config.js, declare redirects and rewrites:
module.exports = { async redirects() { return [ { source: '/blog/yayu', destination: '/blog/yayu_redirects', permanent: true, }, ] }, async rewrites() { return { beforeFiles: [ { source: '/blog/yayu', destination: '/blog/yayu_beforeFiles', }, ], afterFiles: [ { source: '/blog/yayu', destination: '/blog/yayu_afterFiles', }, ], fallback: [ { source: '/blog/yayu', destination: `/blog/yayu_fallback`, }, ], } },}The code for
middleware.js is as follows:import { NextResponse } from 'next/server' export function middleware(request) { return NextResponse.redirect(new URL('/blog/yayu_middleware', request.url))}
export const config = { matcher: '/blog/yayu',}The code for
app/blog/page.js is:import { redirect } from 'next/navigation'
export default function Page() { redirect('/blog/yayu_page')}The code for
app/blog/[id]/page.js is:javascriptCopyimport { redirect } from 'next/navigation'
export default function Page() { redirect('/blog/yayu_slug')}Now we have configured redirects and rewrites in multiple places. The question is, when accessing
/blog/yayu, what URL will be displayed in the browser's address bar?The answer is
/blog/yayu_slug. Following the execution order, when accessing /blog/yayu, it first redirects to /blog/yayu_redirects based on the redirects in next.config.js, then it follows the dynamic route logic and redirects to /blog/yayu_slug.
Middleware Configuration Options
Next.js v13.1 introduced two new configuration options for middleware:
skipMiddlewareUrlNormalize and skipTrailingSlashRedirect, designed to handle specific scenarios.skipTrailingSlashRedirect
First, let's explain Trailing Slashes. A trailing slash is a forward slash at the end of a URL. For example, in
www.yauyjs.com/users/, the last slash is the trailing slash.Generally, trailing slashes are used to distinguish between directories and files. A trailing slash typically indicates a directory, while no trailing slash indicates a file. However, this is just a convention; you can handle it as you prefer.
From a URL perspective,
www.yauyjs.com/users/ and www.yayujs.com/users are two different addresses, but we usually set up redirects. For instance, in Next.js, if you visit /about/, it automatically redirects to /about, and the URL changes to /about.skipTrailingSlashRedirect, as the name suggests, skips the trailing slash redirect. When you set
skipTrailingSlashRedirect to true, if you visit /about/, the URL will remain /about/.
Here's an example of using
skipTrailingSlashRedirect:// next.config.jsmodule.exports = { skipTrailingSlashRedirect: true,}// middleware.jsconst legacyPrefixes = ['/docs', '/blog']
export default async function middleware(req) { const { pathname } = req.nextUrl
if (legacyPrefixes.some((prefix) => pathname.startsWith(prefix))) { return NextResponse.next() }
// Apply trailing slash if (!pathname.endsWith('/') && !pathname.match(/((?!\.well-known(?:\/.*)?)(?:[^/]+\/)*[^/]+\.\w+)/)) { req.nextUrl.pathname += '/' return NextResponse.redirect(req.nextUrl) }}In this example, we're adding a trailing slash to all routes except those with
/docs and /blog prefixes.skipMiddlewareUrlNormalize
Regarding skipMiddlewareUrlNormalize, let's look at an example:
// next.config.jsmodule.exports = { skipMiddlewareUrlNormalize: true,}// middleware.jsexport default async function middleware(req) { const { pathname } = req.nextUrl // GET /_next/data/build-id/hello.json console.log(pathname) // If set to true, value is: /_next/data/build-id/hello.json // If not configured, value is: /hello}Setting skipMiddlewareUrlNormalize to true allows you to get the original address of the route. This is commonly used in internationalization scenarios.
Runtime
When using Middleware, it's important to note that currently, Middleware only supports the Edge runtime and does not support the Node.js runtime. This means that when writing Middleware, you should try to use Web APIs and avoid using Node.js APIs.
Example: Controlling Request Rate
Requirement: If you've ever called OpenAI's API, you'll know that the commonly used ChatGPT v3.5 API has a limit of 3 calls per minute. Now, let's say you've developed an
/api/chat API, and to prevent malicious calls, you want to limit it to a maximum of 3 calls per minute. How would you implement this using Next.js?
npm install limiterreate a new file
app/api/chat/route.js with the following code:import { NextResponse } from 'next/server'import { RateLimiter } from "limiter";
const limiter = new RateLimiter({ tokensPerInterval: 3, interval: "min", fireImmediately: true});
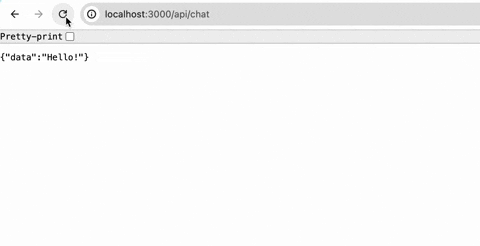
export async function GET() { const remainingRequests = await limiter.removeTokens(1); if (remainingRequests < 0) { return new NextResponse( JSON.stringify({ success: false, message: 'Too Many Requests' }), { status: 429, headers: { 'content-type': 'application/json' } } ) } return NextResponse.json({ data: "Hello!" })}This should run successfully. The effect will be as follows:
Now, we've written the rate-limiting logic in the specific route. Let's try to write it in the middleware:
import { NextResponse } from 'next/server'import { RateLimiter } from "limiter";
const limiter = new RateLimiter({  tokensPerInterval: 3,  interval: "min",  fireImmediately: true});
export async function middleware(request) {  const remainingRequests = await limiter.removeTokens(1);  if (remainingRequests < 0) {    return new NextResponse(      JSON.stringify({ success: false, message: 'Too Many Requests' }),      { status: 429, headers: { 'content-type': 'application/json' } }    )  }  return NextResponse.next()}
// Set matching pathexport const config = { matcher: '/api/chat',}However, you'll find that this code throws an error. Why is that?

This is a common mistake that beginners make when writing middleware. The error occurs because the limiter is actually a library used in a Node.js environment. However, currently, Middleware only supports the
Edge runtime and does not support the Node.js runtime, which is why it throws an error. This project is used as an example just to remind everyone to be aware of runtime issues.
Scalable Middleware Management
If your project is relatively simple, you typically won't write much middleware code, and putting all the code together isn't a big issue. However, when the project becomes complex, such as implementing authentication, request control, internationalization, etc., in the middleware, various logics written together can quickly make the middleware difficult to maintain. So how do we reasonably split the code if we need to implement multiple requirements in the middleware?
A simple way is:
import { NextResponse } from 'next/server'
async function middleware1(request) {  console.log(request.url)  return NextResponse.next()}
async function middleware2(request) {  console.log(request.url)  return NextResponse.next()}
export async function middleware(request) {  await middleware1(request)  await middleware2(request)}
export const config = {  matcher: '/api/:path*',}
A more elegant way is to use higher-order functions:
import { NextResponse } from 'next/server'
function withMiddleware1(middleware) {  return async (request) => {    console.log('middleware1 ' + request.url)    return middleware(request)  }}
function withMiddleware2(middleware) {  return async (request) => {    console.log('middleware2 ' + request.url)    return middleware(request)  }}
async function middleware(request) {  console.log('middleware ' + request.url)  return NextResponse.next()}
export default withMiddleware2(withMiddleware1(middleware))
export const config = { matcher: '/api/:path*',}What's the execution order now? Try printing it out. Doesn't it feel like you're back to learning Redux?
However, this is still a bit cumbersome to write. Let's create a utility function to help us:
import { NextResponse } from 'next/server'
function chain(functions, index = 0) {  const current = functions[index];  if (current) {    const next = chain(functions, index + 1);    return current(next);  }  return () => NextResponse.next();}
function withMiddleware1(middleware) {  return async (request) => {    console.log('middleware1 ' + request.url)    return middleware(request)  }}
function withMiddleware2(middleware) {  return async (request) => {    console.log('middleware2 ' + request.url)    return middleware(request)  }}
export default chain([withMiddleware1, withMiddleware2])
export const config = { matcher: '/api/:path*',}What's the execution order now? The answer is in the order of the array: middleware1, then middleware2.
If using this approach, in actual development, the code might look like this:
javascriptCopyimport { chain } from "@/lib/utils";import { withHeaders } from "@/middlewares/withHeaders";import { withLogging } from "@/middlewares/withLogging";
export default chain([withLogging, withHeaders]);
export const config = { matcher: '/api/:path*',}When writing specific middleware:
javascriptCopyexport const withHeaders = (next) => { return async (request) => { // ... return next(request); };};